How to Build a Sonic Themed Infinite Runner Game in TypeScript With KAPLAY - Part 2/2
In the previous part of the tutorial, we finished implementing Sonic’s movement and jumping logic. We also implemented platforms and background infinite scrolling.
In this part, we will finish what remains to be implemented.
Table of Contents
Implementing Rings for Sonic to Collect
In the entities.ts file, add the following code :
// ... previous code omitted for clarity

export function makeRing(position: Vec2) {
  return k.add([
    k.sprite("ring", { anim: "spin" }),
    k.area(),
    k.scale(3),
    k.anchor("center"),
    k.pos(position),
    k.offscreen(),
    "ring",
  ]);
}
Import the needed assets in main.ts.
// ... last loadSprite call
k.loadSprite("ring", "graphics/ring.png", {
  sliceX: 16,
  sliceY: 1,
  anims: {
    spin: { from: 0, to: 15, loop: true, speed: 30 },
  },
});
// ... loadSound call
The makeRing function creates a ring game object. The offscreen component adds an onExitScreen method to that game object (used later in the tutorial) to destroy it once it leaves the screen.
“ring” is a tag used to identify the game object in collision logic which we will later cover. Multiple game objects can have the same tag.
In main.ts, add the following logic in the game scene to spawn rings.
// ... previous import statement
import { makeSonic, makeRing } from "./entities";

k.scene("game", () => {

  // ... code omitted for clarity

  const spawnRing = () => {
    const ring = makeRing(k.vec2(1280, 610));
    ring.onUpdate(() => {
      ring.move(-gameSpeed, 0);
    });
    ring.onExitScreen(() => {
      k.destroy(ring);
    });

    const waitTime = k.rand(0.5, 3);

    k.wait(waitTime, spawnRing);
  };

  spawnRing();

  // k.onUpdate(() => ...) code omitted for clarity
});
We create a recursive function called spawnRing. When called, it first creates a ring by calling makeRing. In KAPLAY, you can set an onUpdate loop specific to a game object that will be destroyed if the game object is destroyed. In that update loop, we make the ring move to the left at the same rate as the game’s speed. This will give the illusion that Sonic is approaching the ring while in reality, it’s the contrary.
We use the onExitScreen method to destroy the ring when it exits the screen to the left.
Using KAPLAY’s rand function we’re able to get a random number between 0.5 and 3 representing the time to wait before spawning another ring.
KAPLAY’s wait function is used to only call the spawnRing function once the wait time is elapsed.
Implementing a Scoring System
Now that the rings are spawned we need to write the logic for Sonic to collect them. Which implies needing to keep track of the score.
In main.ts, under our game scene, add the following code :
// ... asset loading logic
k.loadFont("mania", "fonts/mania.ttf");

k.scene("game", () => {
  // ... gameSpeed loop

  let score = 0;
  let scoreMultiplier = 0;
  const scoreText = k.add([
    k.text("SCORE : 0", { font: "mania", size: 48 }),
    k.pos(20, 20),
    k.z(2),
  ]);

  // ... rest of the code omitted for clarity
});
In addition to creating variables related to the score, we created a game object acting as our score UI. Using the text component, we’re able to display text on the screen. The second param of that component is used to set the font and sizing needed.
Finally, we use the z component to make sure the score UI is always displayed on top of other game objects by setting it’s z layer to 2.
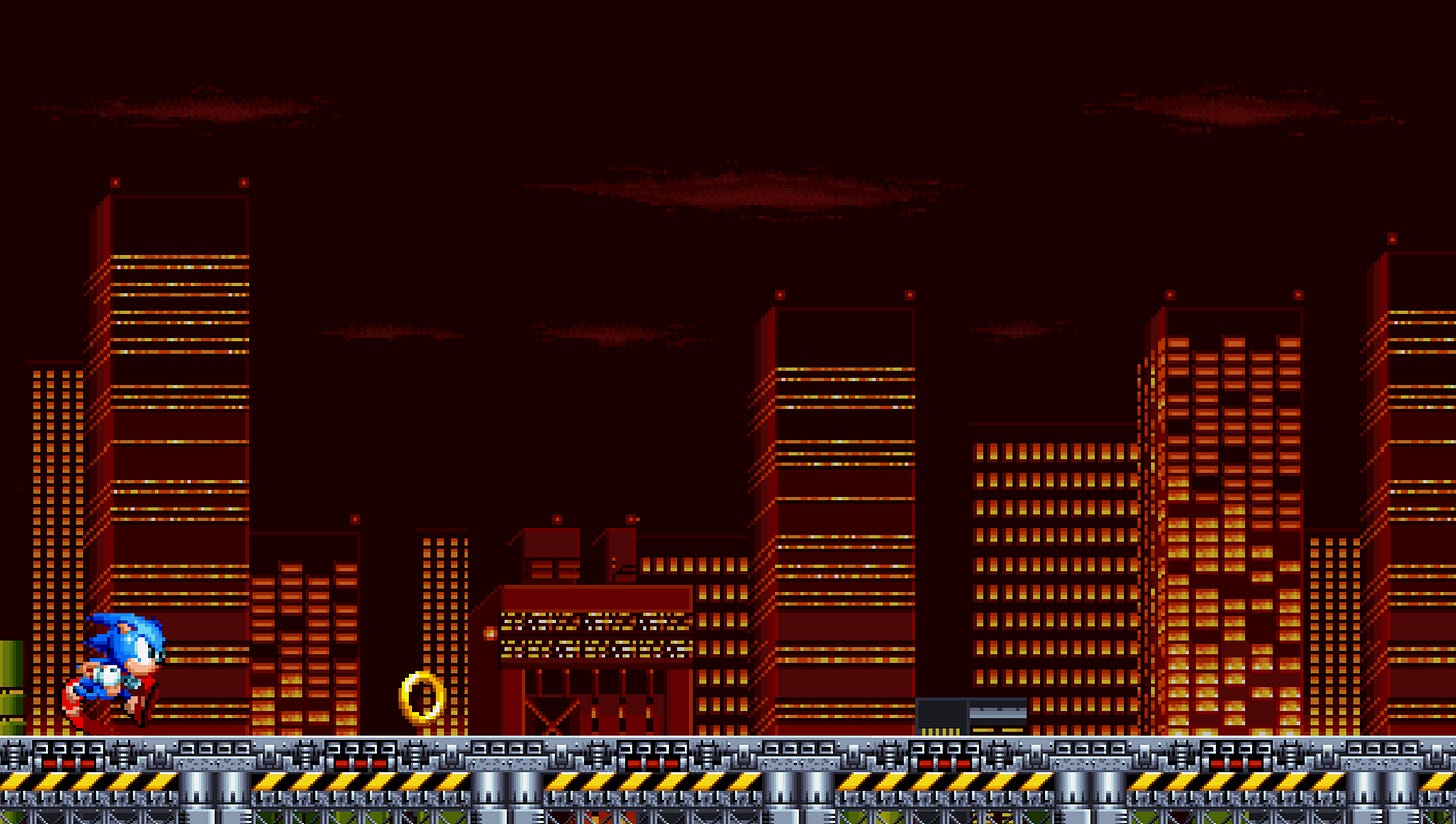
You should have the following result.
Now, let’s update the score every time Sonic collides with a ring. Add the following code in our game scene :
import { GameObj } from "kaplay";

// asset loading logic
k.loadSound("ring", "sounds/Ring.wav");

k.scene("game", () => {

  // after makeRing();

  sonic.onCollide("ring", (ring: GameObj) => {
    k.play("ring", { volume: 0.5 });
    k.destroy(ring);
    score++;
    scoreText.text = `SCORE : ${score}`;
  });

  // before k.onUpdate(() => ...)

});
We used Sonic’s built-in onCollide method which takes as the first param the tag of a game object you want to check collisions with. The second param is a function that will run in case a collision does occur. Here, we play the “ring” sound and then destroy the ring game object Sonic collided with. Finally, we increment the score and change the score UI’s text to reflect the new score.
If you run the game now, you should see the score updating every time Sonic collides with a ring.
Adding Enemies
The code needed for adding enemies to our game is going to be very similar to the one for adding rings. The only difference is that, contrary to rings, if Sonic touches an enemy, it’s game over. However, if Sonic jumps on that enemy, the enemy gets destroyed.
In entities.ts, add the following code :
// ... previous code omitted for clarity

export function makeMotobug(position: Vec2) {
  return k.add([
    k.sprite("motobug", { anim: "run" }),
    k.area({ shape: new k.Rect(k.vec2(-5, 0), 32, 32) }),
    k.scale(3),
    k.anchor("center"),
    k.pos(position),
    k.offscreen(),
    "enemy",
  ]);
}
Here, we defined a function for creating our enemy, the “Motobug”. We used components that should now be familiar to you. However, you might have noticed that we pass an object to the area component. This is something you can do to define a custom hitbox shape. Here, we’re setting the shape of the hitbox to be a rectangle using KAPLAY’s Rect constructor. It allows you to set the hitbox’s origin relative to the game object. If you pass k.vec2(0,0), the origin will be the same as the game object’s. The second and third param of the constructor are used to set the width and the height of the hitbox.
Once we will add enemies to the game, you’ll be able to use the debug mode to view how our hitbox configuration for Motobug is rendered.
Add the following code to main.ts :
// ... import statements omitted for clarity
import { makeSonic, makeRing, makeMotobug } from "./entities";

// ... previous asset loading statements omitted for clarity
k.loadSprite("motobug", "graphics/motobug.png", {
  sliceX: 5,
  sliceY: 1,
  anims: {
    run: { from: 0, to: 4, loop: true, speed: 8 },
  },
});

k.scene("game", () => {
  // ... previous code omitted for clarity

  const spawnMotoBug = () => {
    const motobug = makeMotobug(k.vec2(1280, 595));
    motobug.onUpdate(() => {
      if (gameSpeed < 3000) {
        motobug.move(-(gameSpeed + 300), 0);
        return;
      }
      motobug.move(-gameSpeed, 0);
    });

    motobug.onExitScreen(() => {
      k.destroy(motobug);
    });

    const waitTime = k.rand(0.5, 2.5);

    k.wait(waitTime, spawnMotoBug);
  };

  spawnMotoBug();

  // k.onUpdate(() => ...);
});
The logic for spawning “Motobugs” is mostly the same compared to the one for “rings”. However, the “Motobug”s update loop is slightly different.
motobug.onUpdate(() => {
  if (gameSpeed < 3000) {
    motobug.move(-(gameSpeed + 300), 0);
    return;
  }
  motobug.move(-gameSpeed, 0);
});
When the game’s speed is inferior to 3000 we make the “Motobug” move faster than the scrolling of the platforms so that it appears as moving on the platforms towards Sonic. Otherwise, it would look like Sonic is the one moving towards stationary “Motobugs”.
However, when the game’s speed gets really fast, it isn’t possible to really tell the difference. In that case, we simply make the “Motobug” move at the same rate as the scrolling platforms.
At this point, you should see enemies spawn in your game.
Implementing Collision Logic With Enemies
At the moment, if Sonic collides with an enemy, nothing happens. Likewise, if he jumps on one.
Let’s add the following code in main.ts :
// ... previous asset loading logic omitted for clarity
k.loadSound("hyper-ring", "sounds/HyperRing.wav");
k.loadSound("destroy", "sounds/Destroy.wav");
k.loadSound("hurt", "sounds/Hurt.wav");

k.scene("game", () => {
   // ... previous code omitted for clarity

   sonic.onCollide("enemy", (enemy) => {
    if (!sonic.isGrounded()) {
      k.play("destroy", { volume: 0.5 });
      k.play("hyper-ring", { volume: 0.5 });
      k.destroy(enemy);
      sonic.play("jump");
      sonic.jump();
      scoreMultiplier += 1;
      score += 10 * scoreMultiplier;
      scoreText.text = `SCORE : ${score}`;
      return;
    }

    k.play("hurt", { volume: 0.5 });
    k.setData("current-score", score);
    k.go("game-over");
  });

  // reset multiplier when Sonic hits the ground
  sonic.onGround(() => {
    scoreMultiplier = 0;
  });
  // k.onUpdate(() => ...)

});
If you run the game now, you should be able to jump on enemies and if Sonic hits an enemy while grounded, you will be transitioned over to an empty game over screen.
You’ll notice that we added logic to multiply the player’s score if they jump on multiple enemies before hitting the ground.
We’re also registering the current player score in local storage so we can display it later in the game over scene.
Finishing The Scoring UI
Since our game is very fast paced, it’s hard for players to keep track of how many rings they’re collecting. They would have to look up to the top left of the screen while risking not seeing an enemy in time to avoid it/jump on it.
To mitigate this and to give the player a better sense of what they’re doing, I opted to display the number of rings collected after every collision with a ring or a jump on an enemy. This will also make combos easier to understand.
Add the following code in main.ts to implement this feature :
k.scene("game", () => {
  // ... previous code omitted for clarity
  // sonic.setEvents();

  const ringCollectUI = sonic.add([
    k.text("", { font: "mania", size: 18 }),
    k.color(255, 255, 0),
    k.anchor("center"),
    k.pos(30, -10),
  ]);

  // ...
  sonic.onCollide("ring", (ring: GameObj) => {
    //... previous code omitted for clarity
    ringCollectUI.text = "+1";
    k.wait(1, () => {
     ringCollectUI.text = "";
    });
  });

  // ...
  sonic.onCollide("enemy", (enemy) => {
    if (!sonic.isGrounded()) {
      // ... previous code omitted for clarity
      if (scoreMultiplier === 1)
        ringCollectUI.text = `+${10 * scoreMultiplier}`;
      if (scoreMultiplier > 1) ringCollectUI.text = `x${scoreMultiplier}`;
      k.wait(1, () => {
        ringCollectUI.text = "";
      });
      return;
    }
    // ...
  });
});
Now, if you run the game, you should see a +1 appear every time Sonic collides with a ring and a +10, x2, x3, etc… when he jumps on one or many “Motobugs”.
An important concept present in the code above, is that game objects can have child game objects assigned to them in KAPLAY. This is what we do here :
const ringCollectUI = sonic.add([
  k.text("", { font: "mania", size: 18 }),
  k.color(255, 255, 0),
  k.anchor("center"),
  k.pos(30, -10),
]);
Instead of calling the add function to create a game object, we can call the add method to create a child game object of an existing game object. Here, we create the ringCollectUI as a child of Sonic so that its position is relative to him.
Implementing The Game Over Scene
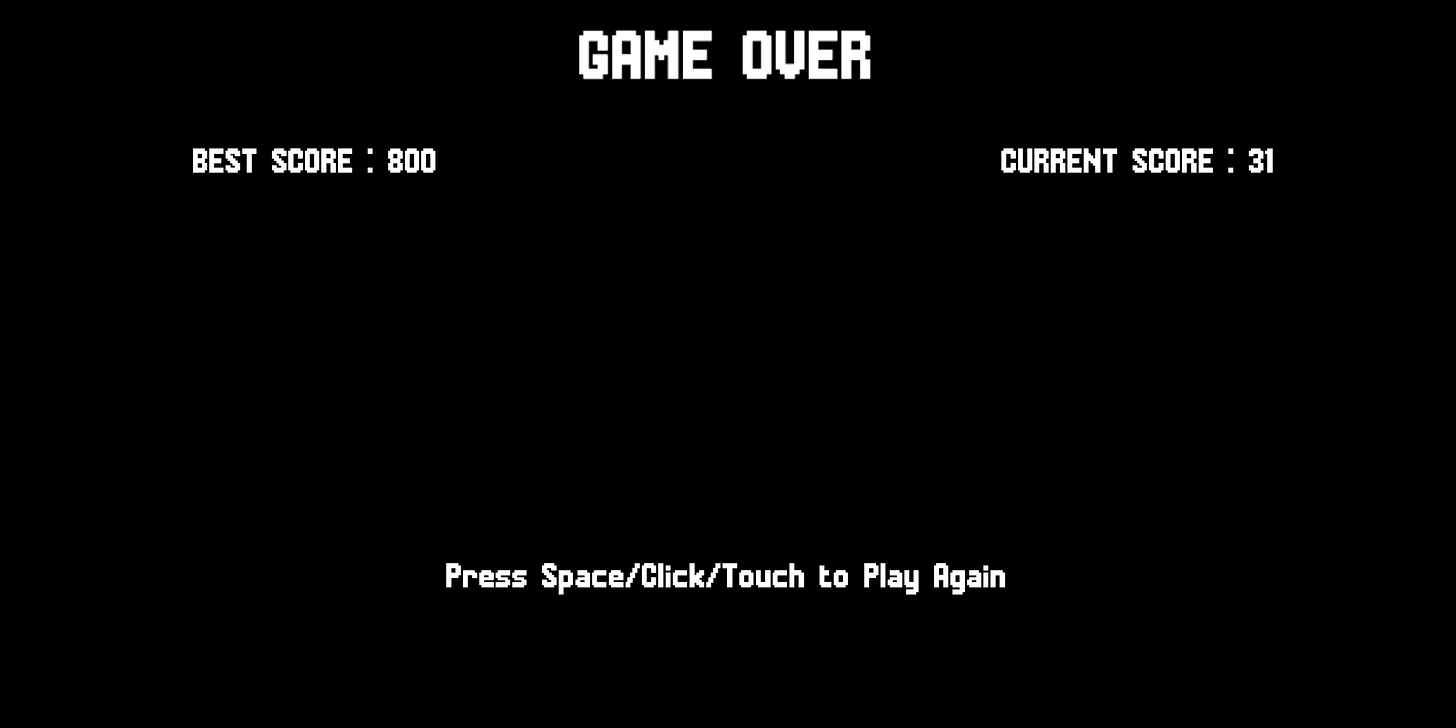
Finally, for our game over screen, let’s display the player current VS best score and allow them to try the game again if they wish to.
In the game over scene code in main.ts, add the following :
k.scene("game-over", () => {
  let bestScore = k.getData("best-score") || 0;
  const currentScore = k.getData("current-score") || 0;

  if (currentScore && bestScore < currentScore) {
    k.setData("best-score", currentScore);
    bestScore = currentScore;
  }

  k.add([
    k.text("GAME OVER", { font: "mania", size: 64 }),
    k.anchor("center"),
    k.pos(k.center().x, k.center().y - 300),
  ]);
  k.add([
    k.text(`BEST SCORE : ${bestScore}`, {
      font: "mania",
      size: 32,
    }),
    k.anchor("center"),
    k.pos(k.center().x - 400, k.center().y - 200),
  ]);
  k.add([
    k.text(`CURRENT SCORE : ${currentScore}`, {
      font: "mania",
      size: 32,
    }),
    k.anchor("center"),
    k.pos(k.center().x + 400, k.center().y - 200),
  ]);

  k.wait(1, () => {
    k.add([
      k.text("Press Space/Click/Touch to Play Again", {
        font: "mania",
        size: 32,
      }),
      k.anchor("center"),
      k.pos(k.center().x, k.center().y + 200),
    ]);
    k.onButtonPress("jump", () => k.go("game"));
  });
});
While it should be relatively easy to figure out what the code above does, I’d like to explain what we do here :
let bestScore: number = k.getData("best-score") || 0;
const currentScore: number = k.getData("current-score") || 0;

if (bestScore < currentScore) {
  k.setData("best-score", currentScore);
  bestScore = currentScore;
}
Using KAPLAY’s getData function we’re able to get the data we previously set in local storage. However, when the player plays the game for the first time, they will not have a best score. That’s why we set bestScore to be 0 if k.getData(“best-score”) returns null which is possible. We do the same with currentScore.
Now, if you run the project, you should have the following game over screen appear after getting hit by an enemy. After, 1 sec you should be able to press the “Jump” button (in our case click or press the space key) to play the game again.
Deployment
Assuming you want to be able to publish the game in web portals like itch.io, you can make a build by creating a vite.config.ts file at the root of your project’s folder and specifying the base as ./.
import { defineConfig } from "vite";

export default defineConfig({
  base: "./",
});
Now, run the command npm run build and you should see a dist folder appear in your project files. Make sure your game still works by testing the build using npm run preview. Finally, once ready to publish, zip your dist folder and upload it to itch.io or to other web game platforms of your liking.
Conclusion
Hope you enjoyed learning how to make games in TypeScript with KAPLAY. If you’re interested in seeing more web developement and game development tutorials from me. I recommend subscribing to not miss out on future releases.
If you’re up for it, you can check out my beginner React.js tutorial.
My React.js Beginner Tutorial is Now Available as a Nicely Formatted PDF
I recently published a beginner React.js tutorial on building a game search app as a series of free substack posts.


