
The KAPLAY Game Library in 5 Minutes

Hi, in this post, I’ll try to explain what is KAPLAY and what are its major concepts in 5 minutes. Let’s get started!
First of all, KAPLAY is an open source library for making games in JavaScript and TypeScript.
It has built-in support for rendering, asset loading, input handling, animations, audio playback, collision detection and physics.
Contrary to Phaser, KAPLAY isn’t OOP (Object-Oriented-Programming) based, instead it offers an entity component system (ECS) where you build game objects using components. Each component enables the game object to have access to certain features, properties and methods.
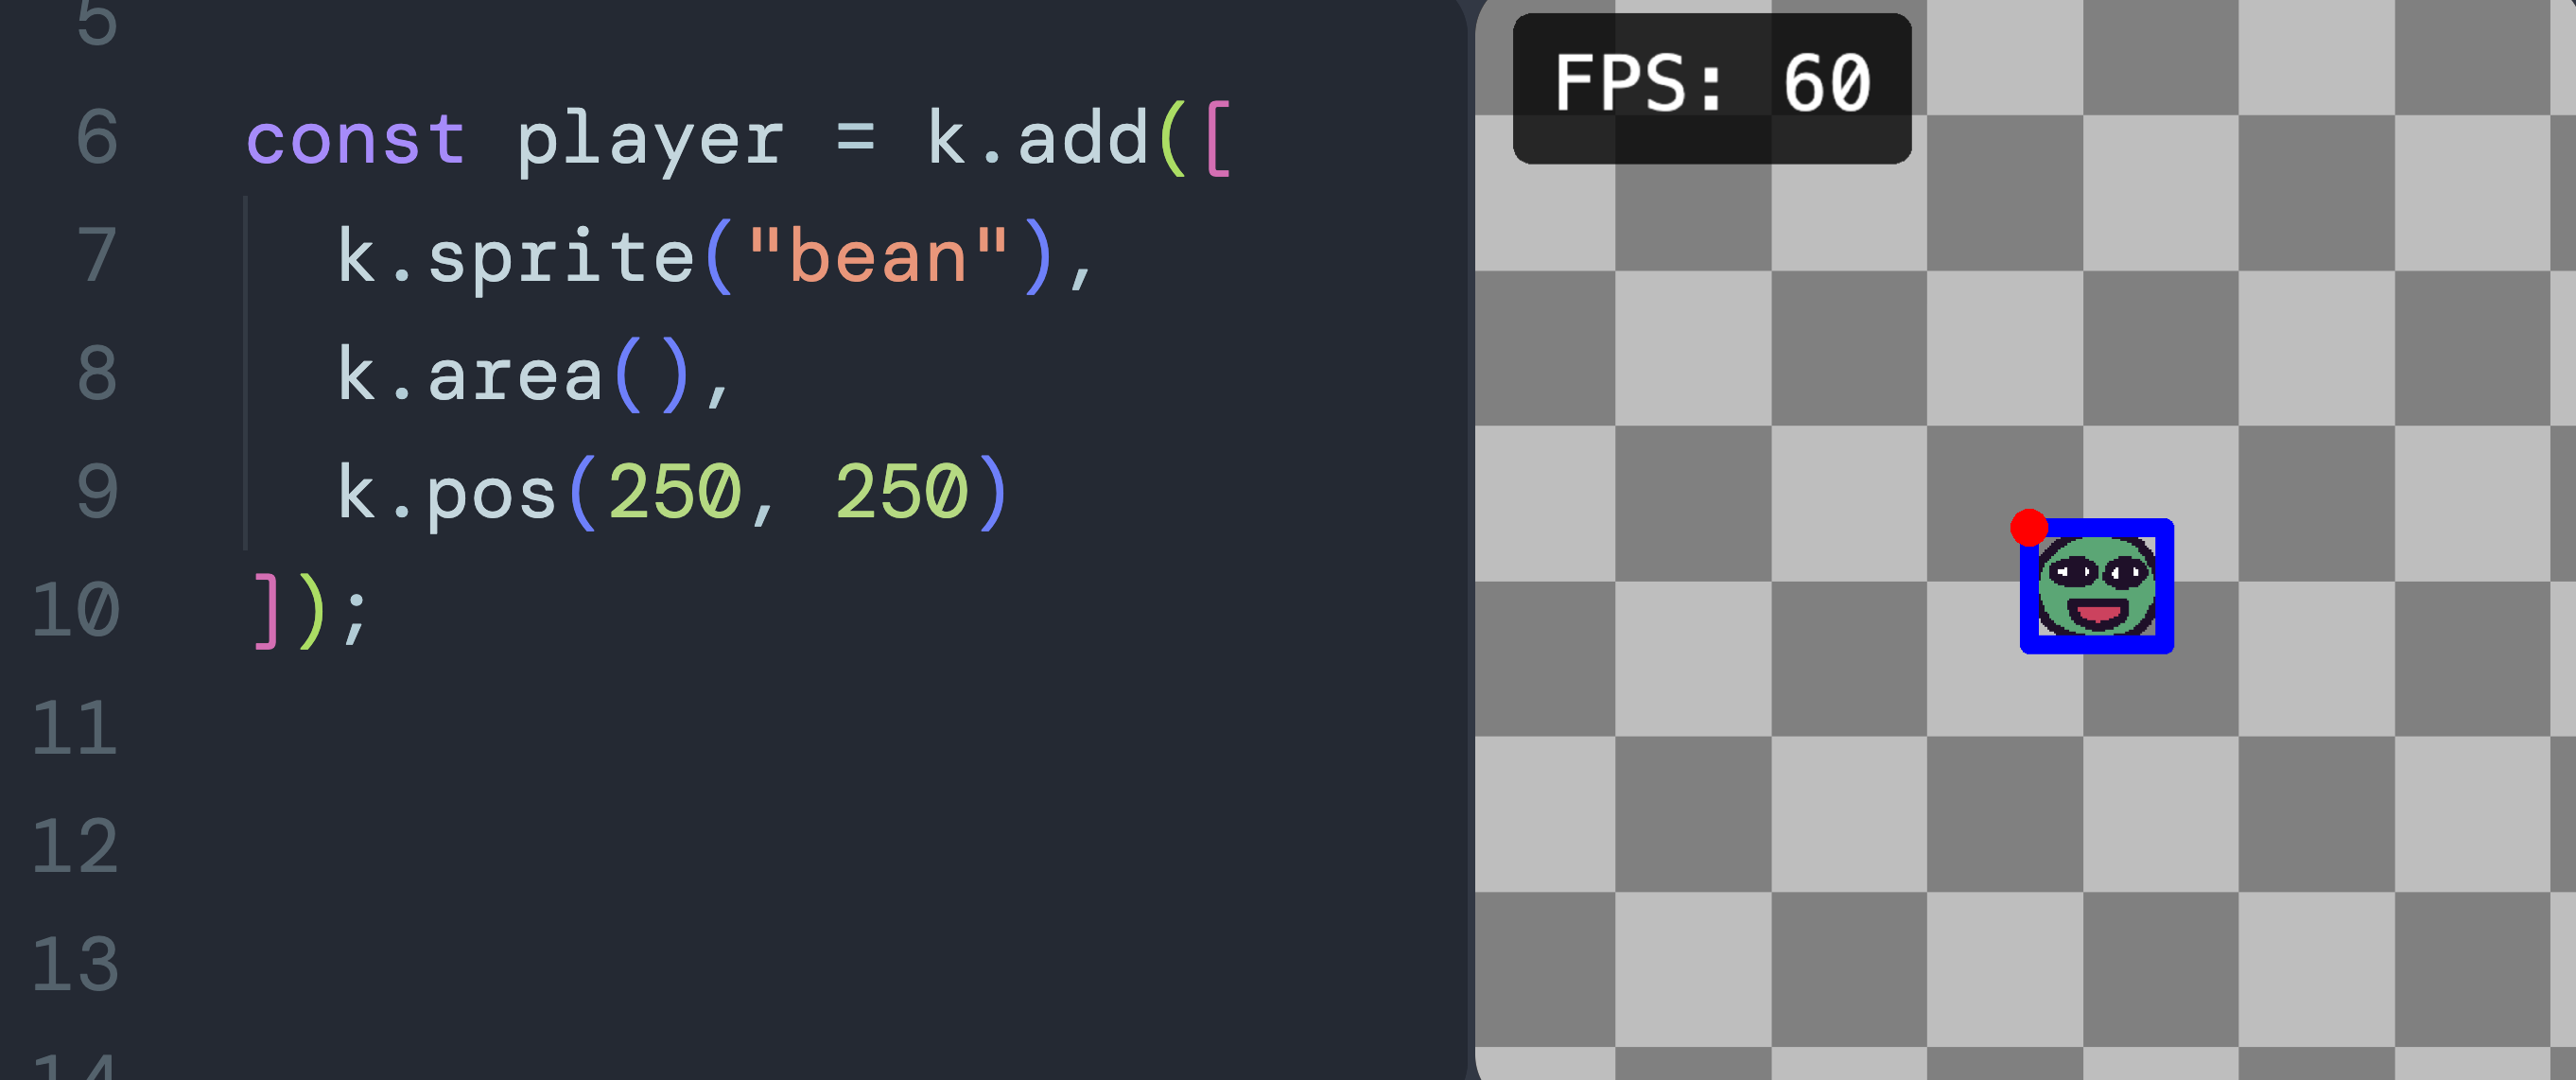
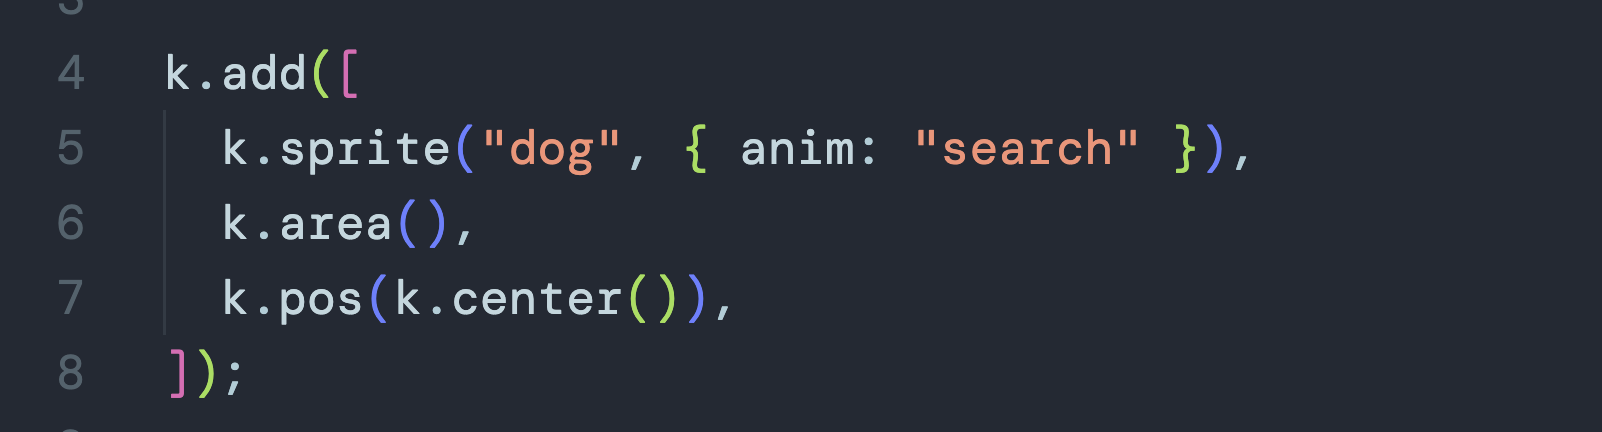
In KAPLAY, a game object is created by passing an array of components to the add function. For example, using the sprite component will allow the game object to be rendered as a sprite. The area component will create a hitbox useful for collision detection. It can be seen using KAPLAY’s debug mode by pressing the f1 key or the fn+f1 keys on a Mac. Finally, the pos component is used to set its position on the canvas.
KAPLAY offers a bunch of ready-made components, increasing development speed. However, you can create your own components if you wish to.
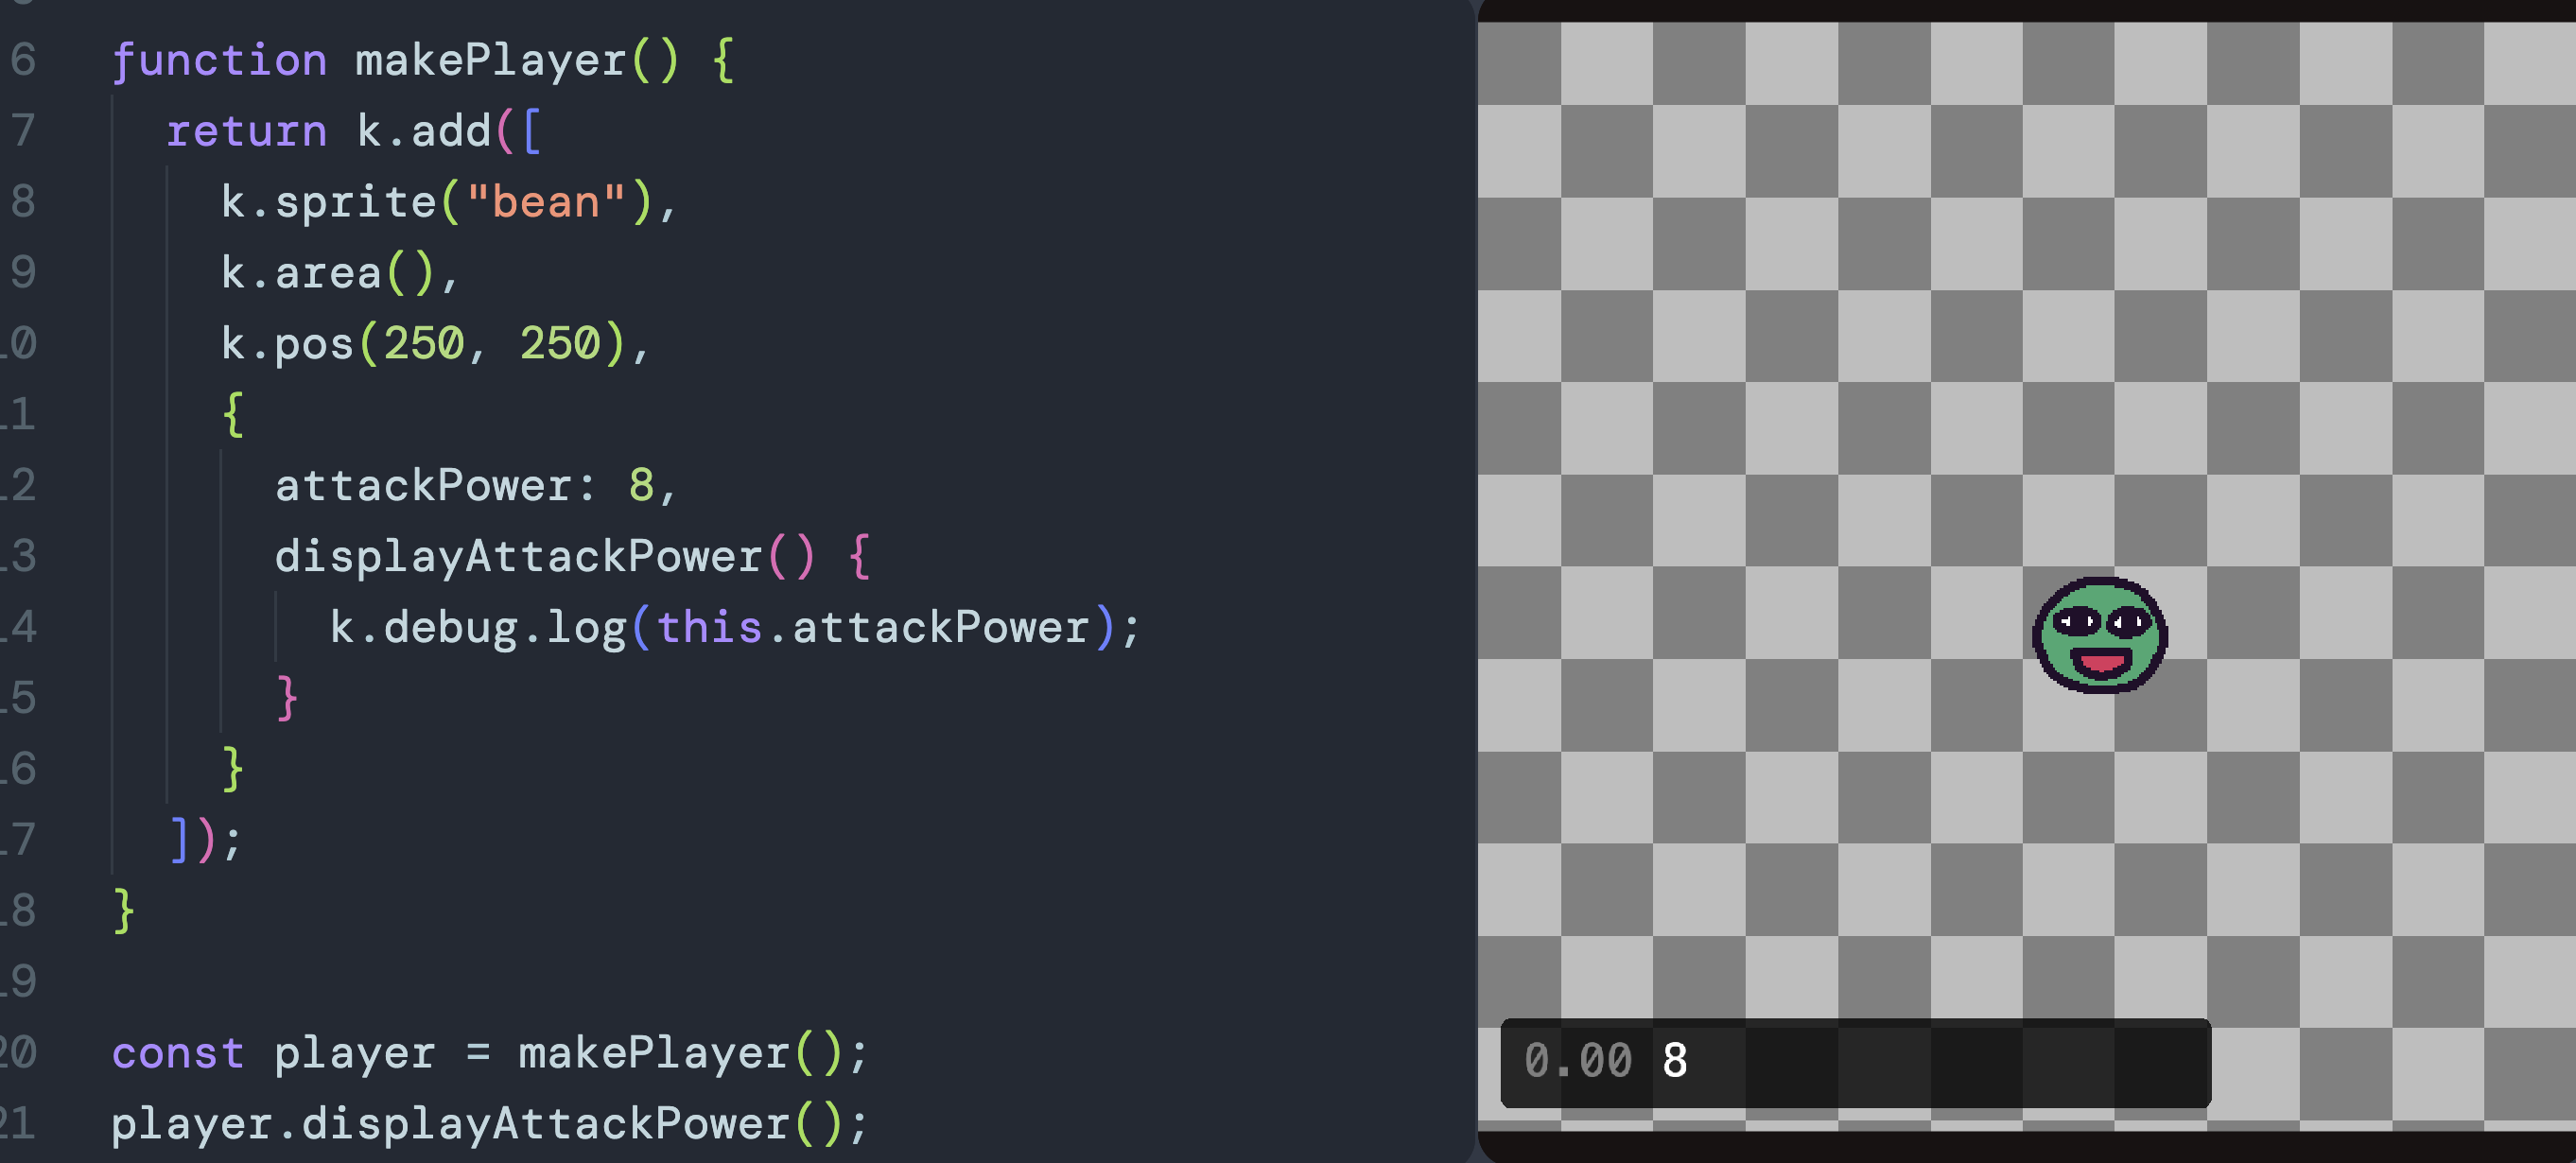
Additionally, passing a JavaScript object to the array of components, allows us to define custom properties and methods which removes the need to create classes like in the OOP (Object-Oriented Programming) paradigm.
As for animations, KAPLAY offers an intuitive animation API. To load a spritesheet use the loadSprite function, pass to it a name you want to use to refer to the spritesheet, the path where the image is located and finally an object telling KAPLAY how to slice it into single frames. This object, should have the sliceX property determining the number of frames per row, the sliceY property determining the number of frames per column and an anims property containing an object for configuring animation data.

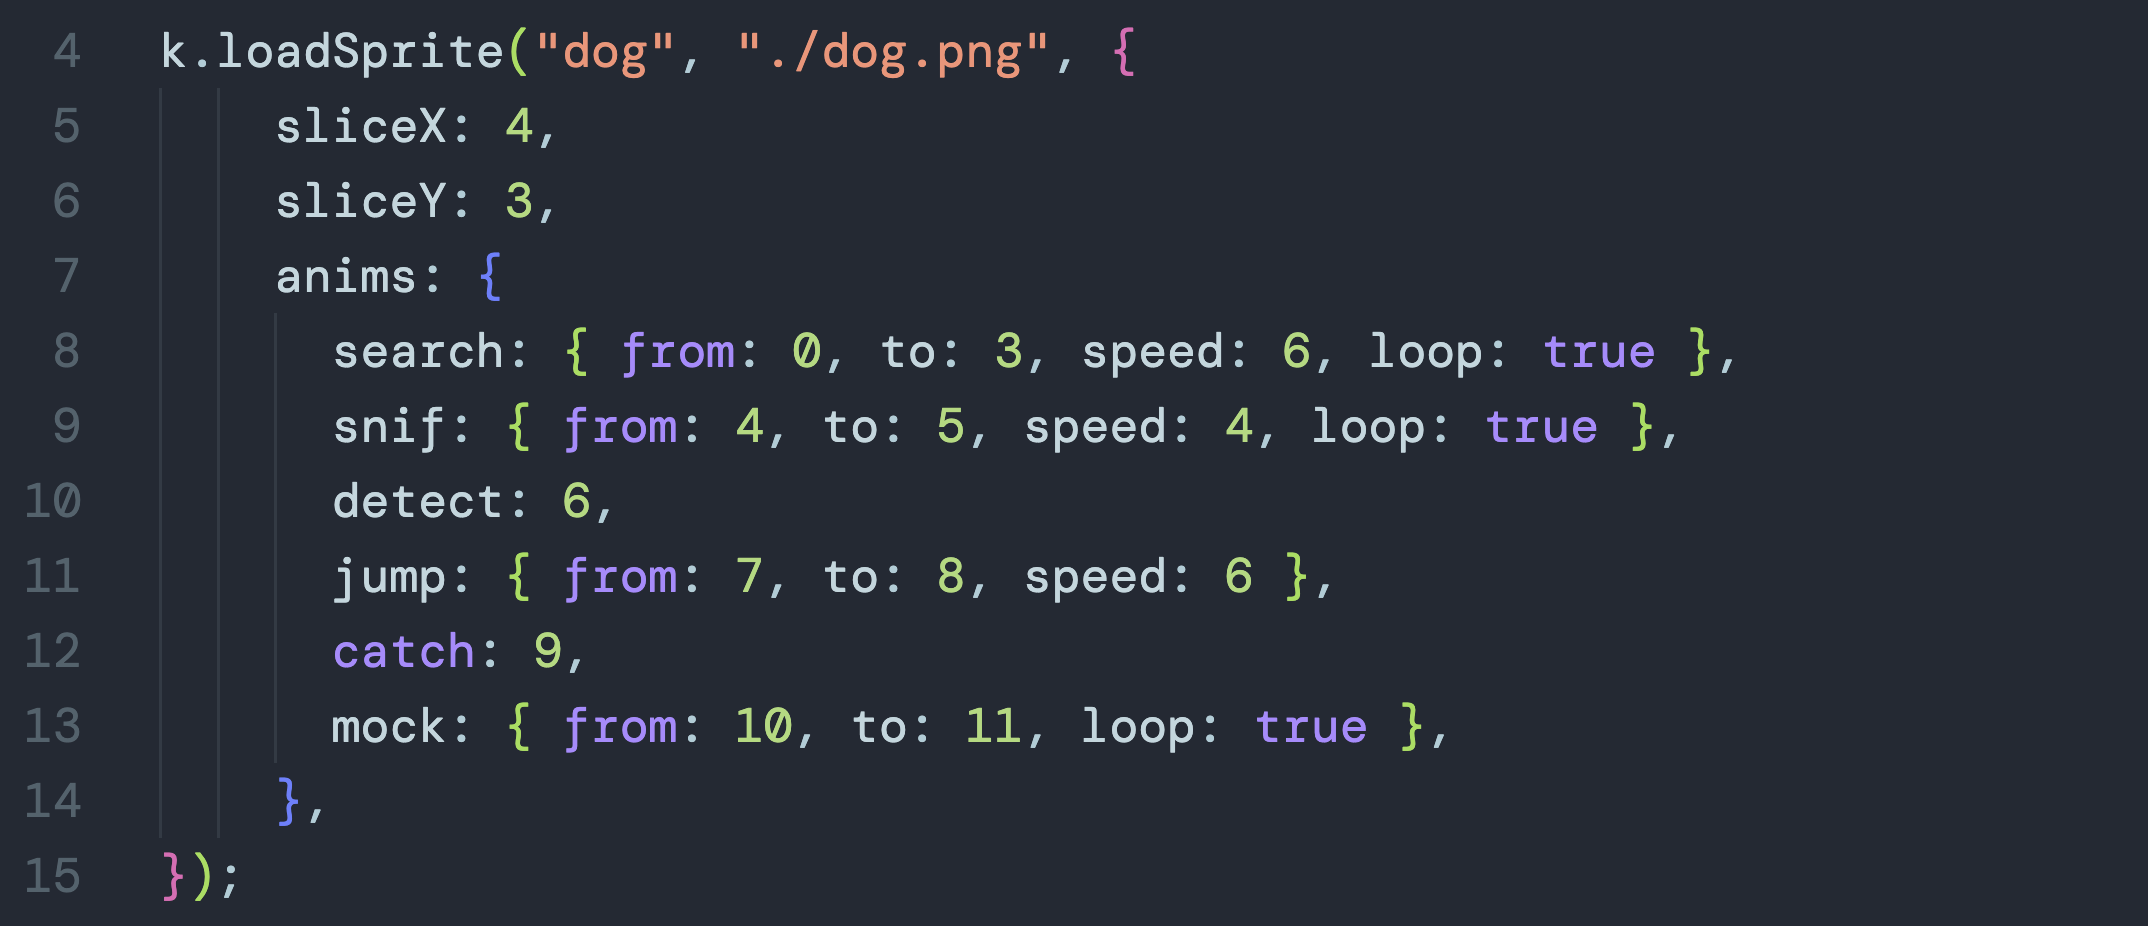
To define an animation, you can pass a key object pair to the anims object. The key determines the name of the animation. The value can be an object with the from property containing the number of the frame where the animation starts, the to property for determining the last frame of the animation and optionally, a loop property containing a boolean where you can set the animation to loop indefinitely and a speed property for setting the speed at which the animation will play.
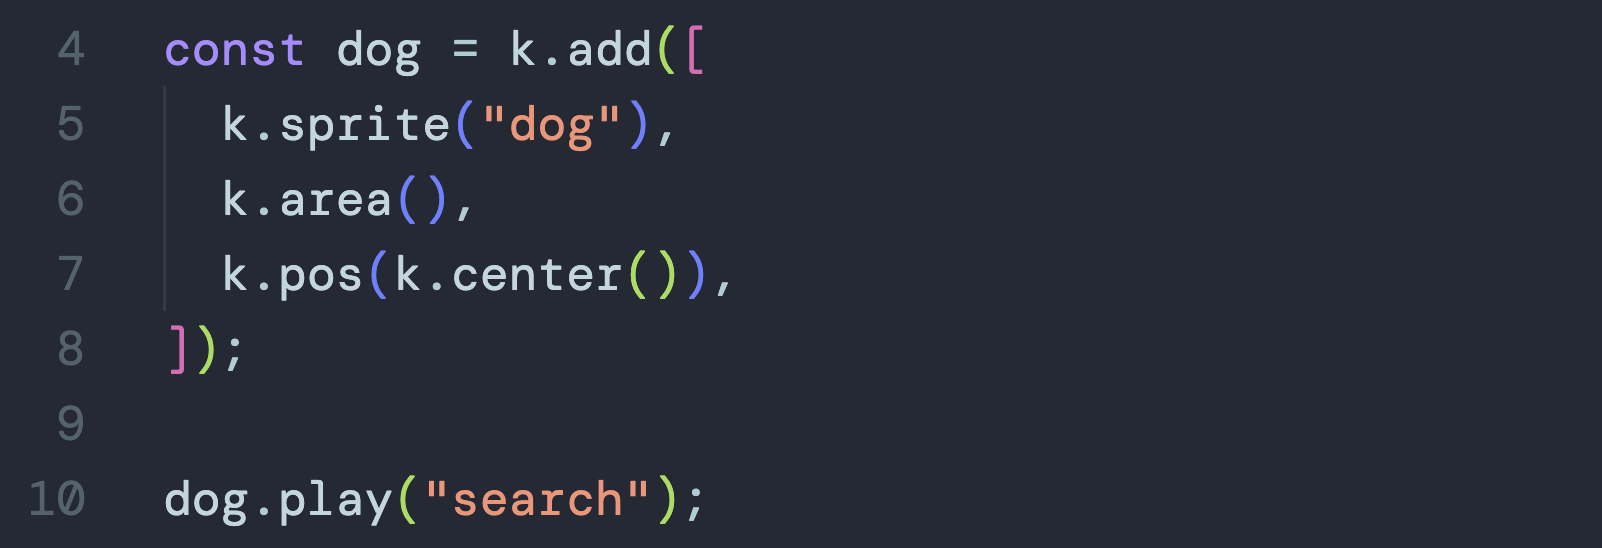
Finally, to play an animation, you can either use the play method available on any game object that uses the sprite component or pass the animation you want to play as a second param to the sprite component where the game object is defined.
Another important concept of KAPLAY are scenes. To create a scene you need to call the scene function and pass a string defining the scene’s name and a function that will run the scene’s logic. You can use the go function to navigate from one scene to another and even pass data to other scenes.
KAPLAY also offers functions for handling user input with support for controller, mouse and keyboard.
You can define virtual buttons in the KAPLAY context where your game is initially configured. Once done, you can use the onButtonPress, onButtonDown, onButtonReleased methods for handling input. For example, the onButtonPress function will be provided a function which will run when any button is pressed. The name of the button being pressed will be passed to that function which you can use to determine whenever to run some logic.
In addition to components and JavaScript objects, you can pass a string to the array of components to give an identifier to a game object. These are called tags and they’re very useful.
A prime example of their use, is for collision detection. Using KAPLAY’s onCollide function you can use tags to handle collisions between two games objects or a game object and a group of game objects or two groups.
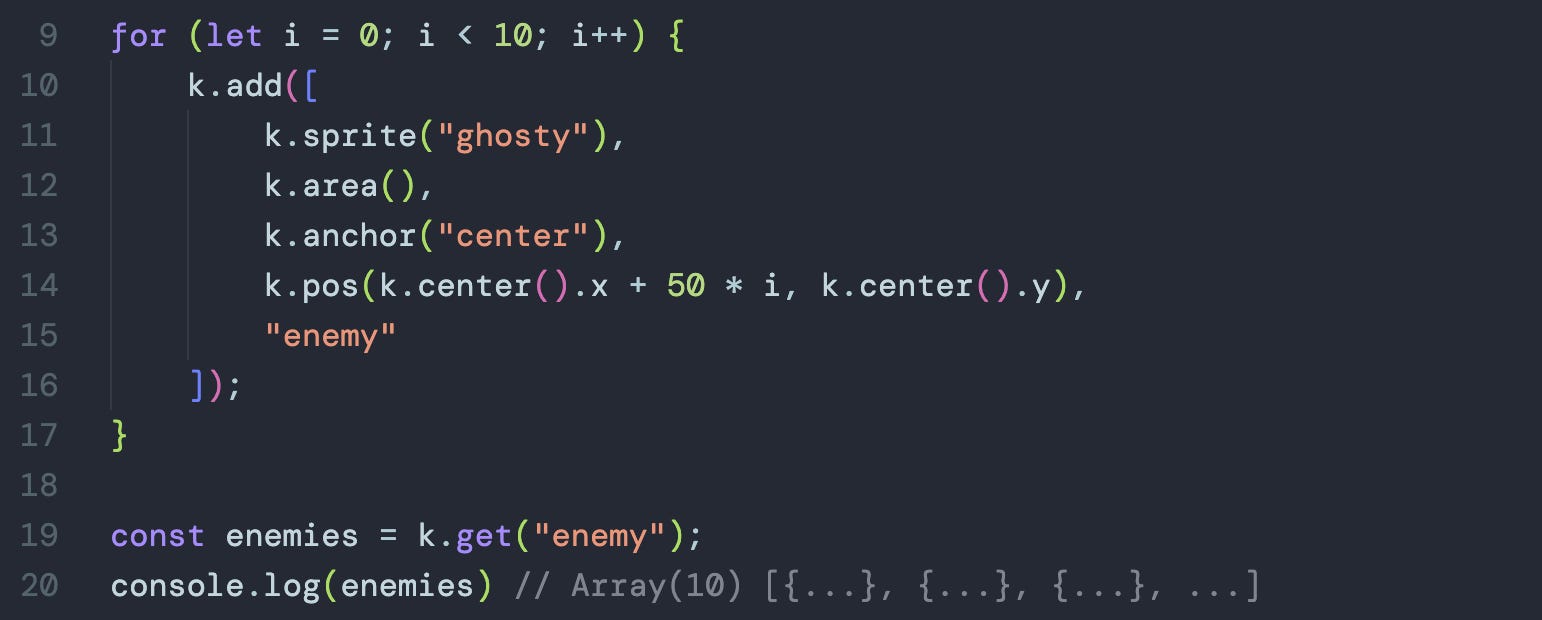
Tags are also useful for querying game objects. Using KAPLAY’s get function you can provide it with a tag and it will return all game objects having that tag.
KAPLAY also has a physics system included which is very easy to use. You can set the gravity per scene by using the setGravity function. To make a game object susceptible to gravity, use the body component. As for a game object acting as a platform, you can within the body component, pass an object with an isStatic property set to true to prevent it from falling off or moving. Additionally, using this component enables the game object to use KAPLAY’s built in jump method. Therefore, you don’t have to implement a jump mechanic yourself.
Another very useful KAPLAY concept is the ability of creating child game objects using the add method available on the parent. You can use the pos component to offset the child’s position vis-a-vis the parent. This makes implementing certain mechanics easier.
Sometimes, you need to run logic every frame. For this purpose, you can create an update loop by using the onUpdate function. Alternatively, you can attach an update loop to a specific game object so that if it ends up destroyed, the update loop is cancelled.
Finally, KAPLAY can be installed like any JavaScript library using a script tag or with NPM but you can also use its web based editor called KAPLAYGROUND which is free.

There are many KAPLAY concepts I haven’t covered here but I hope it gave you a quick overview of the library and helped you determine if you want to invest your time learning it.
If you want to dive deeper, check my project based tutorials using KAPLAY on YouTube. You can also check the API reference and examples in the KAPLAY docs.
Additionally, I offer exclusive KAPLAY tutorials on Patreon. Link is here.
How to Build a Sonic Themed Infinite Runner Game in TypeScript With KAPLAY - Part 1/2

In this tutorial, I’ll teach you how to make a simple Sonic themed infinite runner game in TypeScript using the KAPLAY game library.